|
|
How to add a custom field using Layout DesignerAdding a custom field using Layout Designer (version 2.22 or newer) does not require editing the newticket.html template at all. Just define a custom field using System Setup form (setup.cgi) and watch the custom field instantly available. The following procedure will add 2 custom fields - Phone and Priority. Step 1. Login to System Setup form (setup.cgi), scroll down to Layout Designer section and define two fields as shown below. 
Step 2. Watch the result. Navigate to the contact form (ttx.cgi). Here is what you should see: 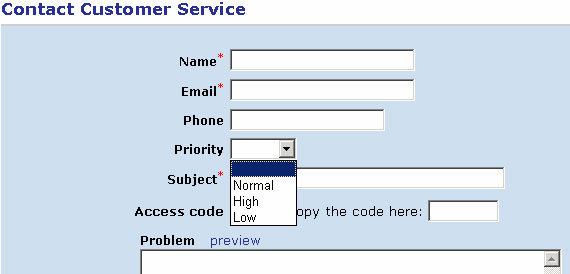
How the magic happens? If you open the newticket.html template you will notice the (%CUSTOMVARS%) macro. When generating a contact form page the Trouble Ticket Express reads custom field definitions and builds html code for each custom field as a two columns row. For each custom field it fills left colum with the field's label and the right one - with the form input formatted according to the field's type. The (%CUSTOMVARS%) macro is replaced with the resulting html code. But what if you need more control over custom fields appearance? For example you may want the Priority to be a hidden field and default to Normal. Here is how: Step 1. Edit newticket.html template. Replace the (%CUSTOMVARS%) macro with the following code (%CUSTOMROW0%) <input type="hidden" name="xPriority" value="Normal"> (%CUSTOMROW2%) (%CUSTOMROW3%) (%CUSTOMROW4%) (%CUSTOMROW5%) (%CUSTOMROW6%) (%CUSTOMROW7%) (%CUSTOMROW8%) (%CUSTOMROW9%) Step 2. Watch the result. Navigate to the contact form (ttx.cgi). Here is what you should see: 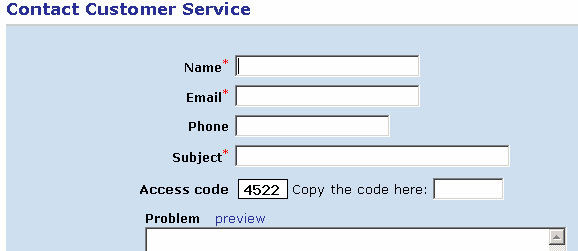
The (%CUSTOMVARS%) macro is the same as a concatenation of (%CUSTOMROW0%) .. (%CUSTOMROW9%) macros. As you may see the (%CUSTOMROWn%) macro is being replaced by an html code for the n-th custom field. And what if you want the Phone field to be mandatory and use Phone Number as a label? Let us introduce the (%CUSTOMn%) macro. Step 1. Edit newticket.html template. Replace the (%CUSTOMROW0%) macro with the following code <tr><td align="right" class="lbl">Phone Number<font color="red"><sup>*</sup></font></td> <td align="left">(%CUSTOM0%) <input type="hidden" name="mandatory" value="xPhone"> </td></tr> Step 2. Watch the result. Navigate to the contact form (ttx.cgi). Here is what you should see: 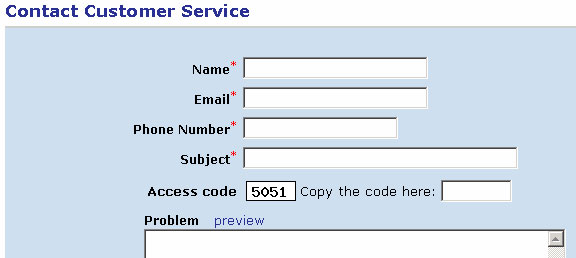
The (%CUSTOMn%) macro provides no html formatting, just an input tag for the n-th custom field. Marking custom fields as mandatory. (Note: the feature requires rel.2.10 or newer). In order to mark any or all custom fields as mandatory use a 'mandatory' input in your form. Value of the input must contain a list of all the custom fields, what may not be left blank. Example: <input type=hidden name=mandatory value="xPhone,xDepartment">You may also define multiple 'mandatory' inputs: <input type=hidden name=mandatory value=xPhone> <input type=hidden name=mandatory value=xDepartment>The later approach allows assigning mandatory status dynamically, for example: <input type=checkbox name=mandatory value="xPhone"> Please call me back. |